What Are Heat Shrink Wire Connectors?

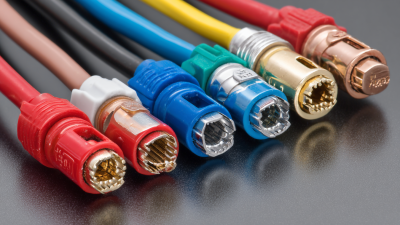
Heat shrink wire connectors are insulated electrical terminals designed to join wires securely and protect the connection from moisture, abrasion, and contamination. They usually combine a metal crimp barrel with a heat-activated adhesive sleeve. When heated correctly, the sleeve contracts around the joint and creates a tighter environmental seal.

They are commonly used in automotive wiring, marine repairs, outdoor equipment, and low-voltage installations. A properly selected connector should match the wire gauge, conductor material, temperature rating, and application conditions. Color coding helps identify size, but it should never replace checking the manufacturer’s specifications. That small step prevents many avoidable failures.

Installation requires more than squeezing a crimp tool. The wire must be stripped to the correct length, inserted fully, and crimped in the designated area. A heat gun usually provides controlled heating without damaging the insulation. An open flame may overheat the sleeve or weaken nearby materials, so it is not a careful choice.

Inspect the finished connection closely. The sleeve should shrink evenly, and the wire should resist a gentle pull. No exposed conductor should remain outside the sealed area. It sounds simple.

However, heat shrink wire connectors are not a universal solution. Poor crimping, incorrect sizing, repeated flexing, or excessive heat can still cause electrical problems. Experienced technicians often test continuity and review the joint before energizing the circuit. I have found that visual confidence can be misleading; a connection may look neat while holding the wire poorly. This guide explains how these connectors work, when to use them, and where their practical limits deserve attention.
What Are Heat Shrink Wire Connectors?

Definition and Function of Heat Shrink Wire Connectors

Heat shrink wire connectors are electrical terminals with a heat-activated seal around their crimp area. They join two wires while helping protect the connection from moisture, dirt, vibration, and corrosion. Inside, a metal sleeve creates the electrical path. Outside, the polymer tubing shrinks tightly when heated. The result is a compact, insulated connection that can support dependable wiring in vehicles, equipment, and outdoor systems.

Their function depends on two actions: crimping and heating. Crimping compresses the metal sleeve around the stripped conductors. This creates mechanical strength and a continuous electrical contact. Heating then reduces the tubing and melts its inner sealant. A properly installed connector should grip the wire firmly, show even shrinkage, and leave no exposed conductor. It is not magic. An incorrect wire size, weak crimp, or overheated sleeve can still cause failure. In practical work, checking the connection by pulling gently is a useful habit.

Tips: Match the connector to the wire gauge. Strip only the recommended insulation length. Use controlled heat, not an open flame. Rotate the heat source slowly around the sleeve. Stop when the tubing fits tightly and sealant appears at the edges. Let the joint cool before bending it. Inspect twice. A rushed installation may look acceptable but fail under vibration. Also, heat shrink connectors should not replace proper circuit protection or careful electrical testing.

Three-Layer Construction: Polyolefin, Adhesive, and Metal Contacts

What Are Heat Shrink Wire Connectors?

Three-Layer Construction: Polyolefin, Adhesive, and Metal Contacts

Heat shrink wire connectors combine insulation, sealing, and electrical joining in one small sleeve. Their three-layer construction gives each part a specific job. The outer polyolefin tube provides mechanical protection and electrical insulation. It shrinks around the joint when heated evenly. A good fit prevents movement and reduces exposure to moisture, dust, and abrasion.

Inside, the adhesive lining softens during heating. It flows around the wire insulation and helps seal the connection. This layer matters in vehicle wiring, outdoor equipment, and other areas with vibration or damp conditions. However, adhesive does not repair poor preparation. Strip the wire carefully, avoid damaged strands, and keep the insulation fully supported.

The metal contact carries current between the conductors. Crimping creates the mechanical and electrical connection before the sleeve shrinks. A properly sized contact should hold the wires firmly without cutting them. I have seen failed joints where the tube looked perfect, but the crimp was loose underneath. That mistake is easy to miss. Check the wire size, pull the joint gently, and inspect both ends. Use controlled heat, not an open flame, because uneven heating can burn the tube or leave the adhesive poorly sealed. The result may look acceptable. It may not be reliable.

What Are Heat Shrink Wire Connectors? — Three-Layer Construction: Polyolefin, Adhesive, and Metal Contacts
Data Dimension Typical Specification or Characteristic Primary Function Practical Importance
Connector Type Heat-shrink crimp connector, commonly supplied as butt, ring, fork, bullet, or spade terminal styles Joins or terminates insulated electrical conductors Selection should match the connection geometry and the conductor size
Outer Layer Cross-linked polyolefin tubing Provides electrical insulation, mechanical protection, and strain relief Polyolefin is lightweight, flexible, and commonly resistant to moisture, abrasion, and many automotive fluids
Polyolefin Shrink Ratio Commonly 2:1; some designs use approximately 3:1 Allows the sleeve to contract tightly around the wire and connector body A higher ratio is useful when the wire diameter varies or the connection includes thicker insulation
Inner Adhesive Layer Thermoplastic hot-melt adhesive lining Flows during heating and forms a seal around the wire insulation Helps reduce water, humidity, dust, and contaminant entry after properly shrinking
Adhesive Activation Typically softens and flows at approximately 80–120 °C, depending on formulation Fills small gaps between the connector sleeve and the cable jacket The adhesive should visibly flow at the edges without being burned or excessively displaced
Metal Contact Usually tin-plated copper or copper-alloy crimp barrel Creates the low-resistance electrical path between conductors Tin plating improves solderability and helps protect the base metal from oxidation
Contact Construction Crimp barrel with a centered conductor-entry passage; some terminals include inspection windows Holds the stripped conductors through mechanical compression A correctly formed crimp is essential because the metal contact carries the electrical and mechanical load
Common Conductor Range Frequently available for approximately 22–10 AWG solid or stranded wire, depending on terminal size Defines the compatible conductor cross-section The wire range printed on the connector or packaging should be followed; undersized or oversized wire can produce an unreliable crimp
Typical Voltage Rating Often rated up to 600 V for general-purpose insulated terminals, subject to the specific product design Indicates the maximum intended electrical potential under specified conditions The lowest voltage rating among the connector, wire, equipment, and applicable standard should govern the installation
Typical Operating Temperature Commonly about −55 to 125 °C for polyolefin-insulated designs Defines the intended service-temperature range Continuous exposure above the rated limit can weaken insulation, adhesive sealing, and crimp reliability
Heating Method Controlled hot-air or heat-gun application; open flames are generally not recommended Shrinks the polyolefin and activates the adhesive Even heating helps prevent scorching, uneven shrinkage, and damage to nearby insulation
Installation Sequence Slide connector onto the wire, strip the specified length, insert conductors, crimp, then heat evenly Combines mechanical retention with environmental sealing The connector must be placed on the wire before crimping because it cannot normally be installed afterward
Wire Preparation Clean, undamaged insulation; strip length commonly ranges from about 5–10 mm, depending on connector design Exposes enough conductor for full barrel engagement without leaving excessive bare wire Incorrect strip length can reduce pull-out strength or leave an unsafe exposed conductor
Moisture Protection Adhesive-lined sleeve creates a sealed interface when fully recovered around the insulation Helps protect the crimp from humidity and splash exposure Sealing performance depends on clean surfaces, correct sizing, complete shrinkage, and undamaged insulation
Electrical Performance Low-resistance connection when the conductor size, crimp profile, and tool are correctly matched Limits voltage drop and localized heat generation A loose, incomplete, or over-crimped connection can increase resistance and cause heating under load
Mechanical Performance Retention is produced by the compressed metal barrel; the recovered sleeve adds insulation and strain relief Resists conductor pull-out, vibration, and flexing The heat-shrink layer should not be treated as a substitute for a properly executed crimp
Inspection Indicators Crimp is centered, conductor is retained, insulation is not cut, and adhesive has flowed evenly at the ends Provides visual evidence of installation quality Reject connectors showing cracked tubing, exposed conductor beyond the intended area, or incomplete recovery
Best-Suited Environments Automotive, marine, industrial control, outdoor low-voltage wiring, and equipment-repair applications Provides an insulated and more environmentally resistant connection than an unsealed crimp alone Final suitability still depends on temperature, chemicals, vibration, current, voltage, and applicable installation requirements
Technical note: Specifications are typical industry ranges and can vary by connector size, construction, and applicable testing standard. Always verify the individual connector’s wire range, temperature rating, voltage rating, crimp-tool requirements, and environmental qualification before use.

Electrical Ratings and UL 486D Compliance for Reliable Connections

Heat shrink wire connectors join conductors while adding insulation and environmental protection. A crimped metal barrel carries current inside a heat-activated sleeve. When heated, the sleeve contracts around the wire. Adhesive may melt around the edges, helping block moisture, salt, and dust.

Electrical ratings deserve careful attention. Check the listed wire range, conductor material, voltage, temperature, and current capacity. These details are not interchangeable. A connector rated for 600 volts may still be unsuitable for a high-temperature application. The wire size must match the connector barrel. Too little compression creates resistance and heat. Too much force can damage the conductor.

UL 486D compliance indicates that a sealed wire connector system has been evaluated against defined safety requirements. Look for certification information on the packaging and technical documentation. Do not assume every heat shrink connector meets this standard.

Installation also affects compliance. Strip the insulation to the specified length, use the correct crimp profile, and apply steady heat. Keep the flame moving. Uneven heating can scorch the sleeve or leave gaps in the seal. A firm pull test helps reveal weak crimps. It is a simple check.

Field conditions can expose mistakes quickly. I have seen connectors pass a visual inspection but loosen under vibration. That detail is easy to miss. Clean conductors, correct tooling, and documented ratings make connections more dependable. Even experienced installers should recheck the instructions, because connector designs and test limits can differ.

3:1 Shrink Ratios and −55°C to 125°C Operating Temperature Ranges

What Are Heat Shrink Wire Connectors?

3:1 Shrink Ratios and −55°C to 125°C Operating Temperature Ranges

Heat shrink wire connectors join conductors while adding insulation and mechanical support. Their 3:1 shrink ratio is especially useful when wire diameters vary. For example, a connector may shrink from 3 millimeters to about 1 millimeter. This range helps it grip insulation more evenly after heating. It does not mean the connector shrinks three times shorter. That misunderstanding causes poor installations.

In field checks, the seal usually depends on correct crimping before heating. The heat must be distributed around the connector, not concentrated at one point. A properly recovered sleeve should fit tightly without burning, splitting, or exposing adhesive. The −55°C to 125°C operating range suits many outdoor, vehicle, and industrial environments. However, this rating describes service conditions, not the recommended heating temperature. Cable insulation may tolerate less heat. I have seen connectors look sealed but fail later because the wire was under-crimped. The 3:1 ratio cannot correct a weak electrical connection.

Tips: Match the connector to the wire gauge. Strip only the required insulation length. Use a controlled heat source and rotate the wire slowly. Check for full recovery and a firm crimp. For cold installations, allow the joint to cool naturally before flexing it. Also, verify the datasheet, because temperature ratings and sealing performance can vary. A small test piece is worthwhile. Mistakes are cheaper there.

Installation Steps, IP67 Sealing, and Common Connector Applications

What Are Heat Shrink Wire Connectors?

Heat shrink wire connectors combine electrical crimping with a protective, shrinking sleeve. They are useful where vibration, moisture, and abrasion can damage exposed joints. The connection becomes more reliable when the wire size matches the connector range. A loose crimp can overheat, even when the sleeve looks perfect.

Installation requires careful preparation. Strip only the specified length, then insert each conductor fully into the metal barrel. Crimp the center section with a compatible tool and check that no copper strands escape. Keep the joint straight. Apply steady heat from the center outward until the tubing grips the insulation. Adhesive may appear at the ends. That detail matters. Do not rush. Excessive heat can scorch insulation or weaken the seal.

An IP67-rated connector assembly should resist dust and temporary water immersion under defined test conditions. However, the rating depends on correct installation, wire size, and the complete assembly. It is not guaranteed by shrinking alone. Inspect both ends for gaps, loose wires, or uneven adhesive flow. I have seen installers focus on the sleeve and overlook a poor crimp underneath. That remains a practical weakness. These connectors commonly suit automotive harnesses, marine wiring, outdoor lighting, trailer circuits, irrigation controls, and low-voltage sensors. For critical systems, verify continuity and perform an insulation or water-resistance check before service.

Heat Shrink Wire Connectors: IP67 Protection and Installation

IP ratings are defined by IEC 60529. The first digit indicates protection against solid particles, while the second digit indicates protection against water. IP6X means dust-tight, and IPX7 means protection against temporary immersion in water up to 1 metre for up to 30 minutes. Therefore, IP67 combines both levels when the connector is correctly installed and sealed.

Typical installation steps are: strip the wire insulation, insert the conductors, crimp the metal sleeve, and apply controlled heat until the outer tubing shrinks tightly around the connection. Common applications include automotive wiring, marine electrical systems, outdoor lighting, industrial control wiring, and low-voltage repairs.