Choosing the right wire nuts starts with the wires, not the color of the connector. Wire gauge, conductor count, and material all affect fit. A connector that feels snug may still be wrong for the combination inside it. Check the manufacturer’s package chart before twisting anything together.
Electrical educator Mike Holt often emphasizes matching the connector to the conductors and following its listed instructions. A useful reminder for this guide is: “A secure connection begins with the right connector for the exact wire combination.” Treat that as a practical principle, not a substitute for product instructions. Look for the approved wire range, permitted wire types, and installation method. Copper and aluminum conductors, for example, may require different connectors. Never assume one model suits every job.
The sections ahead explain how to read wire-nut sizing, compare connector styles, and inspect a completed connection. Picture a crowded junction box, a short lead, and three conductors waiting to be joined. Small details matter. Even experienced DIYers can misjudge a fit by feel alone. I have to admit, color coding can seem simpler than it is; brands may use different systems. When a project falls outside your experience, pause and ask a qualified electrician. Good connections should be deliberate, documented by the product guidance, and checked before power is restored.
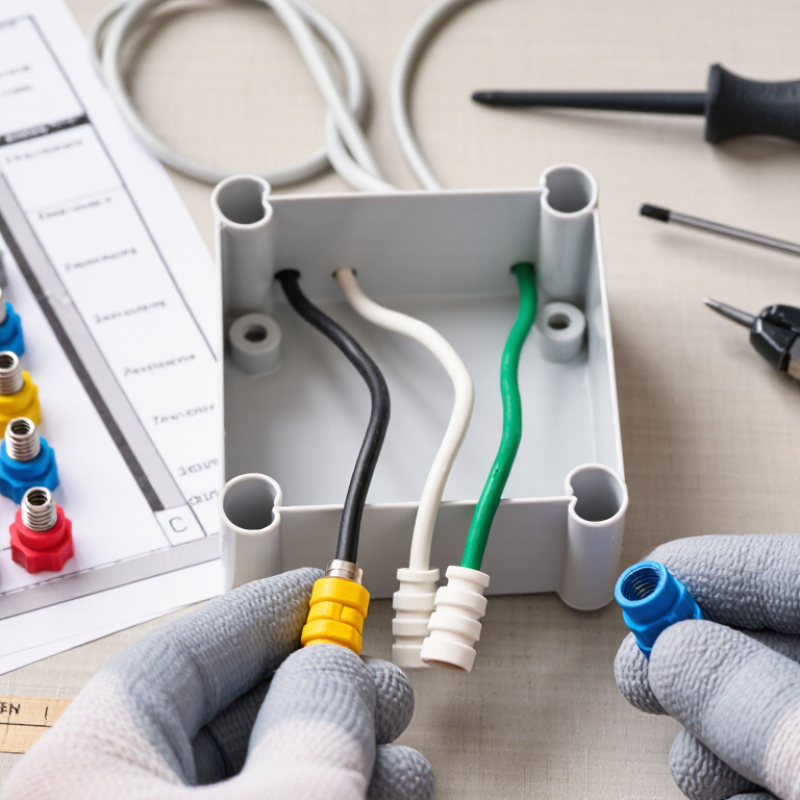
How to Choose the Right Wire Nuts for Your Project?
Wire nuts are small, but their function is critical. They join conductors mechanically and electrically inside an enclosure. The right type depends on wire size, conductor count, material, and environment. Twist-on nuts suit many household copper connections. Winged designs provide better grip when gloves or limited space make twisting difficult. Push-in connectors work differently and must match their listed conductor types.
Color is not a universal sizing system. Always read the package range. Check the approved combination, such as two solid wires or one solid and two stranded wires. A nut rated for copper may not accept aluminum conductors. Moisture-prone locations require a listed waterproof connector, not ordinary tape wrapped around a standard nut. That shortcut feels practical, but it can fail.
The National Fire Protection Association reported about 35,150 home structure fires annually involving electrical distribution and lighting equipment from 2016 to 2020. These fires caused approximately 470 deaths and $1.3 billion in property damage each year. Those figures make connection quality more than a minor detail. Strip insulation to the specified length, align the conductors, and twist until no bare copper remains outside. Gently pull each wire afterward. It is simple, but often skipped. I still find this step easy to underestimate, especially during rushed repairs. Use only connectors carrying appropriate safety markings and installation instructions. When the wire combination is unclear, stop and verify it with a qualified electrician.
Choosing a wire nut starts with conductor size, not color. Read the connector’s printed range chart carefully. A connector rated for two 14 AWG solid wires may not accept six 12 AWG wires. Stranded conductors also change the combination. Use only combinations listed for solid, stranded, or mixed conductors. Copper and aluminum should never share a connector unless it is specifically approved for that purpose.
Strip each wire to the marked length. Align the insulation, twist the conductors evenly, and check that no bare copper extends beyond the shell. A gentle tug should not loosen the connection. This small test catches many installation errors. The connection should feel firm, not crushed. I would recheck the chart every time, because memory is unreliable and connector ranges vary.
NFPA reported an annual average of 32,810 U.S. home structure fires involving electrical distribution and lighting equipment from 2015 to 2019. Those fires caused about 470 deaths, 1,100 injuries, and $1.3 billion in property damage, according to its Home Fires Involving Electrical Distribution and Lighting Equipment report. Correct sizing matters. So does certification to the applicable connector standard, such as UL 486C. A common mistake is choosing the largest connector available. Bigger is not automatically safer. The listed conductor combination is what matters.
Choosing a wire nut starts with its material, not its color. The shell should resist heat, impact, and moisture where the installation requires it. Common insulating materials include nylon and thermoplastic compounds. The internal spring must grip the conductors without cutting them. UL 486C evaluates twist-on wire connectors for mechanical security and electrical performance.
Temperature ratings deserve close attention. A connector marked 105°C is not permission to exceed the cable’s rating. The complete connection follows the lowest-rated component. Check the conductor type, size range, insulation temperature, and approved combination of solid or stranded wires. Voltage ratings also matter. Never assume a connector rated for one application suits every circuit. The National Electrical Code requires connections to remain mechanically and electrically secure.
A common field mistake is trusting appearance.
NFPA’s report on home electrical distribution fires, covering 2015–2019, estimated about 35,150 fires annually, with 470 civilian deaths and 1,100 injuries. Loose connections can create resistance, heat, and eventual failure. Before installation, strip only the specified length, align the copper ends, and twist until the connector is firmly seated. Tug each conductor individually. It should not move. I would still recheck the manufacturer’s chart, because “fits” and “is rated for” are not the same thing. Keep the installation record when the circuit is inspected later.
Compare conductor insulation temperature classes, then verify the connector’s own markings for temperature, voltage, conductor material, and wire combinations.
How to use this chart: The bars show common conductor insulation temperature classes—not wire-nut temperature ratings. Choose a connector listed for the conductor material and exact wire combination, and confirm its marked temperature and voltage ratings are suitable for the installation. Follow applicable electrical codes and the connector manufacturer’s instructions.
Choosing the proper wire nut size starts with the conductor combination, not the nut’s color. Check the package chart for wire gauge, conductor count, and material. Solid copper and stranded copper may require different ranges. Aluminum conductors need connectors specifically listed for aluminum use. Never assume a larger connector is automatically safer.
UL 486C covers twist-on wire connectors and their performance requirements. The National Fire Protection Association reported an average of 32,680 U.S. home structure fires involving electrical distribution and lighting equipment each year from 2016 to 2020. These figures do not blame wire nuts directly, but they show why connection quality deserves attention.
A connector should match the listed wire range, insulation temperature, and installation instructions.
Strip only the recommended length. Keep the copper clean and evenly aligned. Twist the conductors firmly, then check for exposed copper below the connector. Give each wire a gentle pull. It should stay secure. Box space matters too, especially with several connections packed behind a device. I still recheck crowded boxes, because a connection can feel tight while one conductor remains loose. That is an easy mistake to miss. Field conditions, damaged insulation, or mixed conductor types can also change the correct choice. When the chart does not clearly cover the combination, stop and verify the listing or consult a qualified electrician.
Before installing wire nuts, switch off the circuit breaker and verify the wires are dead with a properly rated voltage tester. Do not trust the breaker label alone. Test each conductor against the others and the grounding point. Select a connector matched to the wire gauge, conductor material, and number of wires. Check its instructions carefully, because required strip length and wire combinations can vary.
Strip the insulation cleanly, without nicking the copper. Align the conductors evenly, then twist the connector clockwise until it feels firmly seated. Some connectors require pre-twisting, while others do not. Follow the product instructions instead of relying on habit. No bare copper should extend beyond the connector, except where the instructions specifically allow it. Gently tug each wire. A loose conductor needs immediate correction.
A secure connection should pass both visual and electrical checks. Look for uneven wire ends, cracked insulation, or a connector that spins without tightening. After replacing the cover, restore power and test the circuit with an approved tester. Check the connection under normal operation for unusual warmth, buzzing, flickering, or a burning smell. Stop immediately if any sign appears. I once assumed a tight-looking connector was reliable, but one conductor had barely entered the nut. That mistake changed my inspection routine. When wire sizes, aluminum conductors, or crowded boxes create uncertainty, ask a qualified electrician to evaluate the installation.
| Stage | What to Check | Selection or Installation Guidance | A Good Result |
|---|---|---|---|
| 1. Identify the conductors | Wire material, gauge (AWG), number of wires, and whether the conductors are solid or stranded. | Read the wire markings or project documentation. Choose a connector whose package lists the exact combination of wire sizes, materials, and conductor count. | Every conductor in the splice falls within the connector’s listed combination range. |
| 2. Match the connector | Connector listing, conductor capacity, and wire material compatibility. | Do not select by color alone; color coding and capacity can vary. Use a connector listed for the specific conductor combination. Copper and aluminum must not be joined with a connector unless it is specifically rated for that use and the installation instructions are followed. | The connector is undamaged, suitable for the conductors, and used within its listing. |
| 3. Make the area safe | Power isolation and absence of voltage. | Switch off the circuit at the breaker, prevent accidental re-energizing, and verify the conductors are de-energized with an appropriately rated tester before handling them. | The tester confirms no voltage at the conductors before work begins. |
| 4. Prepare the wires | Insulation condition, conductor ends, and strip length. | Cut back damaged or badly oxidized conductor as appropriate. Strip insulation to the length specified by the connector instructions; avoid nicking or cutting wire strands. | Conductors are clean and undamaged, with no insulation trapped in the connection area. |
| 5. Install the wire nut | The connector’s installation method and conductor alignment. | Follow the connector’s instructions, including whether conductors should be pre-twisted. Place the connector over the aligned conductors and tighten as directed; do not force an overfilled connector. | The connector is seated securely and covers the exposed conductor ends as specified. |
| 6. Inspect and check the splice | Exposed copper, loose wires, damaged insulation, and connector fit. | With power still off, inspect the connection and gently tug each conductor individually. If a conductor moves, the connector loosens, or bare copper is exposed beyond the connector in a way not allowed by its instructions, remake the splice. | No conductor pulls free, the connector remains secure, and there is no unintended exposed conductor. |
| 7. Restore and test | Enclosure, circuit operation, and signs of a fault. | Place the splice in an approved electrical enclosure, secure the cover, and restore power only after the work area is clear. Use a suitable tester to check circuit operation; turn off power again before any further handling. | The enclosure is closed and the circuit operates as intended, with no unusual heat, odor, or breaker tripping. |
| 8. Know when to stop | Unclear wiring, unfamiliar materials, or a connection outside the connector’s listing. | Do not improvise with unknown wire types, damaged conductors, or incompatible materials. Consult a qualified electrician when the correct connector or safe procedure is uncertain, and follow applicable local electrical codes. | The splice is completed only when the materials, connector, and installation method are verified as suitable. |